

In our previous ChatGPT Plugin tutorials, we saw how to build plugins based on third party APIs, including an AI news assistant and a stock screening assistant.
In this guide, we're going to building a new ChatGPT that doesn't rely on third party APIs, and instead allows users to select an educational track. Each track will guide user's through a set of pre-defined prompts, ask questions, and provide feedback for an interactive learning experience.
For this example ChatGPT Plugin, users will be able to select the Prompt Engineering & LLM track, which will guide them through key concepts and provide code examples for each section.
Similar to our previous plugins, we'll be using a Flask app to serve our API to ChatGPT and hosting the code on Replit. We'll also need to create the following following files:
- A
main.pyto serve the API's functionality - A
tracks.pyto define our educational tracks - A plugin manifest
ai-plugin.jsonto serve the metadata - An
openapi.yamlfile to document the plugin for ChatGPT
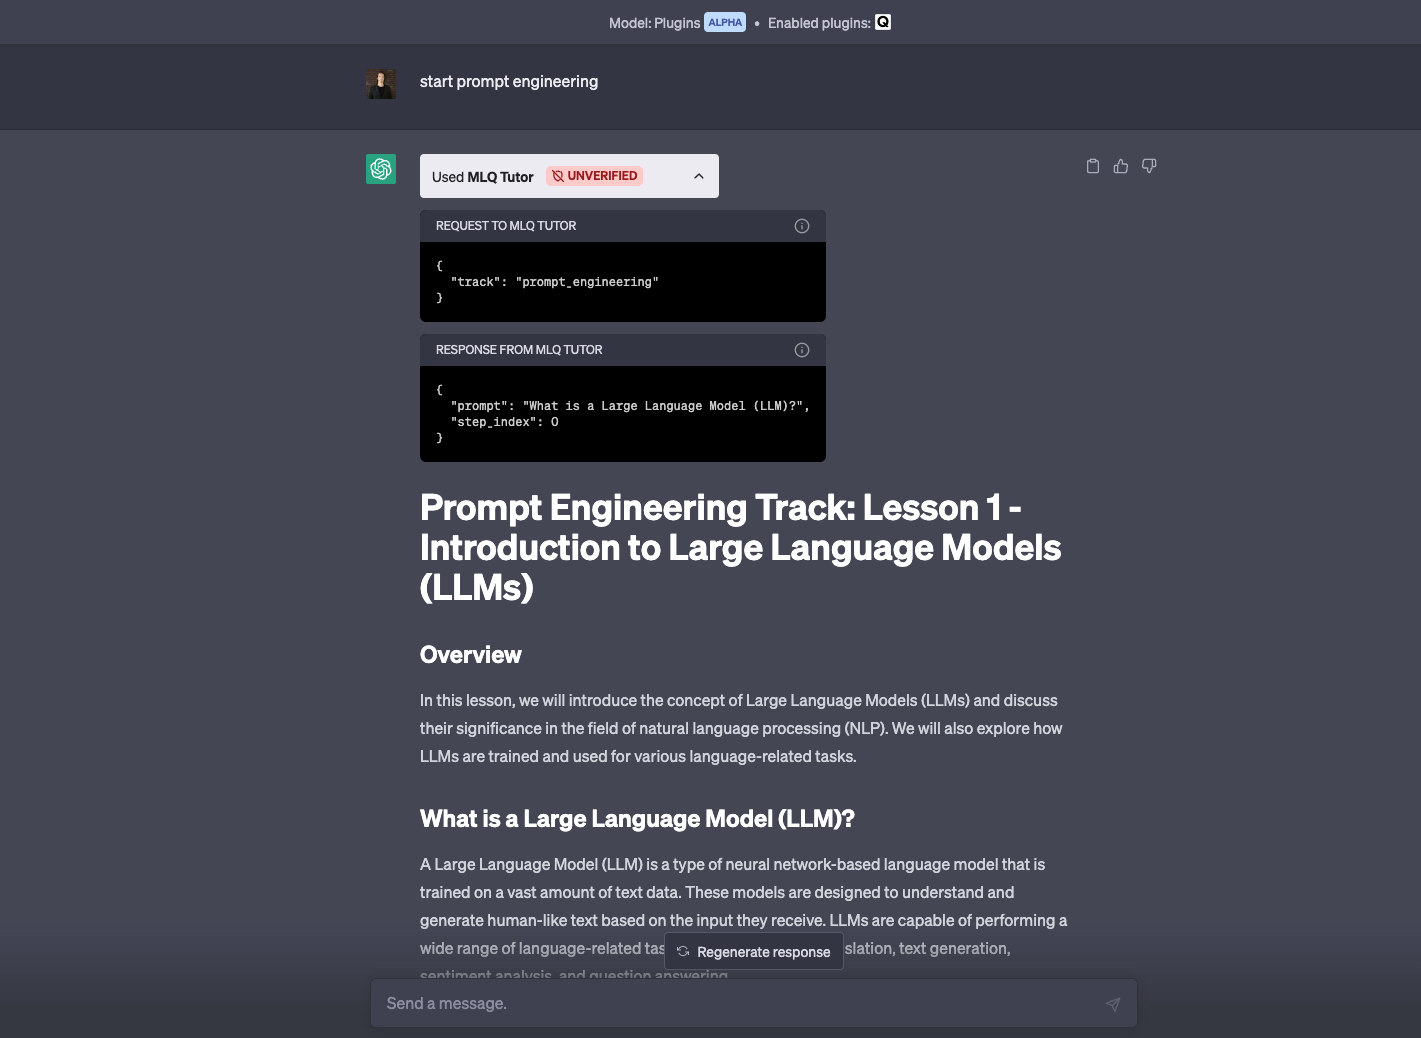
When this plugin is enabled, users can say things like "learn prompt engineering, which will enroll them in the appropriate educational track and start at lesson 1.
After each lesson, the AI tutor will ask users to answer a question relevant to the topic, and provide feedback as well as additional resources before moving on to the next step in the track.
Now that we know what we're building, let's start off by building the main API functionality to guide user's through educational tracks.
Step 1: Building the API functionality
As mentioned, we'll be using Replit for this project, so we'll start a new Python Repl and create a main.py with the following code.
Imports & constants
First, we'll import the necessary packages, import our predefined tracks from the EDUCATIONAL_TRACKS dictionary in tracks.py, and initialize our Flask app:
from flask import Flask, request, jsonify, send_from_directory, redirect, session
from waitress import serve
from tracks import EDUCATIONAL_TRACKS

app = Flask(__name__)
Start a track
Next, we'll define a start_track function that takes in a user-defined track name and starts with the first step in the track:
@app.route('/start_track', methods=['POST'])
def start_track():
  track_name = request.json.get('track')
  EDUCATIONAL_TRACKS.keys())
  track = EDUCATIONAL_TRACKS.get(track_name)
  if track is None:
    return jsonify({"error": "Track not found"}), 400
  # Start the student at the first step of the track.
  step_index = 0
  step = track['steps'][step_index]
  return jsonify({"prompt": step['prompt'], "step_index": step_index})
Next step in track
We'll also define a next_step function that 1) provides feedback for the user's response from the previous step and 2) moves the user the next step if available.
Here's an overview of what this function does:
- Retrieves the track name, current step, and user's response from the request
- With the current step it retrieves predefined response feedback from the track, which will include relevant resources to learn more
- Checks if there are more steps in the track, increments to the next step if so
- Returns a JSON response with the feedback, the updated step index, and the prompt for the next lesson
@app.route('/next_step', methods=['POST'])
def next_step():
  track_name = request.json.get('track')
  step_index = request.json.get('step_index')
  user_response = request.json.get('user_response')

  track = EDUCATIONAL_TRACKS.get(track_name)
  if track is None:
    return jsonify({"error": "Track not found"}), 400

  if step_index >= len(track['steps']):
    return jsonify({"error": "No more steps in this track"}), 400

  # Provide feedback for the current step.
  current_step = track['steps'][step_index]
  feedback = current_step['response']

  # Move to the next step if available.
  step_index += 1
  if step_index < len(track['steps']):
    next_step = track['steps'][step_index]
    return jsonify({
      "feedback": feedback,  # Include feedback in the response
      "next_prompt": next_step['prompt'],
      "step_index": step_index
    })
  else:
    return jsonify({
      "feedback": feedback,  # Include feedback in the response
      "next_prompt": None,
      "step_index": step_index
    })
Serving plugin files
Now that we've got our basic educational track functionality setup, we just need to serve the necessary ChatGPT plugin files, including the ai-plugin.json manifest file located within the .well-known folder, the openapi.yaml file, and the logo.
@app.route('/.well-known/ai-plugin.json')
def serve_ai_plugin():
  return send_from_directory('.well-known',
                             'ai-plugin.json',
                             mimetype='application/json')


@app.route('/openapi.yaml')
def serve_openapi_yaml():
  return send_from_directory('.', 'openapi.yaml', mimetype='text/yaml')


@app.route('/logo.png')
def serve_logo():
  return send_from_directory('.', 'logo.png', mimetype='image/png')


if __name__ == '__main__':
  serve(app, host="0.0.0.0", port=8080)
With these API functions and routes in place, our Flask app is now set up to handle incoming requests from ChatGPT and serve the necessary files.
Step 2: Create an educational tracks dictionary
Next up, let's create a file called tracks.py that will store our eductional content in a dictionary called EDUCATIONAL_TRACKS.
In this example, we'll create a single track for prompt engineering & LLMs that looks like this:
EDUCATIONAL_TRACKS = {
  "prompt_engineering": {
    "steps": [
      # Section 1: Introduction to LLMs & Generative AI
      {
        "prompt":
        "What is a Large Language Model (LLM)?",
        "response":
        "A Large Language Model (LLM) is a type of AI model that is trained on vast amounts of text data to understand and generate human-like text. LLMs are capable of various natural language processing tasks, such as language translation, text generation, question-answering, and more. GPT-3, developed by OpenAI, is an example of an LLM. You can learn more about LLMs here: https://www.mlq.ai/what-is-a-large-language-model-llm/"
      },
      # ... (include all steps from Section 1)

      # Section 2: Introduction to Prompt Engineering
      # ... (include all steps from Section 2)

      #...

      # Section 8: Exploring Autonomous Systems
      # ... (include all steps from Section 8)
    ]
  }
}
In this case, each step in the track is an object wtih a prompt, which contains the section's question or topic and response provides feedback that the API can choose to provide before continuing to the next section.
Step 3: Create the plugin manifest
Next, let's create a file called ai-plugin.json in the .well-known folder for our plugin manifest, which as OpenAI describes:
...includes metadata about your plugin (name, logo, etc.), details about authentication required (type of auth, OAuth URLs, etc.), and an OpenAPI spec for the endpoints you want to expose.
In the plugin manifest, we'll include the following information:
- Name & description for both humans and the model
- User authentication, which we'll set to none for testing
- API configuration, which includes the OpenAPI URL (update this with your Replit URL)
- Logo and contact info
{
  "schema_version": "v1",
  "name_for_human": "MLQ Tutor",
  "name_for_model": "mlqTutor",
  "description_for_human": "Plugin for teaching AI/ML concepts to students, including working with LLMs and prompt engineering.",
  "description_for_model": "Plugin for teaching AI/ML concepts, including working with language models and prompt engineering. The plugin offers a Prompt Engineering educational track with a sequence of predefined educational steps. The plugin provides detailed explanations, code examples, and feedback for each step. Students can interact with the plugin to ask questions, respond to prompts, and advance through the track. The plugin aims to provide feedback to the user's responses before continuing to the next step for an interactive and educational experience for students.",
  "auth": {
    "type": "none"
  },
  "api": {
    "type": "openapi",
    "url": "https://your-project.username.repl.co/openapi.yaml",
    "is_user_authenticated": false
  },
  "logo_url": "https://your-project.username.co/logo.png",
  "contact_email": "support@example.com",
  "legal_info_url": "http://www.example.com/legal"
}
Step 4: Documenting the API with OpenAPI
Lastly, we need to document the API with an OpenAPI specitication, which provides a natural language description for the model to understand its endpoints.
Here you'll just need to update the server URL to your Replit: https://your-repl-url.username.repl.co.
Then, the OpenAPI specifiction defines the two main enpoints /start_track and /next_step and defines the schema for the JSON repsonses:
openapi: "3.0.2"
info:
  title: "MLQ Tutor API"
  version: "1.0.0"
servers:
  - url: "https://your-repl-url.username.repl.co"  # Update this
paths:
  /start_track:
    post:
      operationId: startTrack
      summary: "Start an educational track"
      requestBody:
        required: true
        content:
          application/json:
            schema:
              type: object
              properties:
                track:
                  type: string
                  description: "The name of the track to start."
                  enum: ['prompt_engineering']  # Specify available track names
      responses:
        "200":
          description: "The first prompt of the selected track and the current step index."
          content:
            application/json:
              schema:
                type: object
                properties:
                  prompt:
                    type: string
                  step_index:
                    type: integer
        "400":
          description: "An error occurred (e.g., track not found)."
          content:
            application/json:
              schema:
                type: object
                properties:
                  error:
                    type: string
  /next_step:
    post:
      operationId: nextStep
      summary: "Move to the next step in the track and receive feedback"
      requestBody:
        required: true
        content:
          application/json:
            schema:
              type: object
              properties:
                track:
                  type: string
                  description: "The name of the track."
                  enum: ['prompt_engineering']  # Specify available track names
                step_index:
                  type: integer
                  description: "The index of the current step."
                user_response:
                  type: string
                  description: "The user's response to the current step's prompt."
      responses:
        "200":
          description: "Feedback for the current step, the next prompt (if available), and the updated step index."
          content:
            application/json:
              schema:
                type: object
                properties:
                  feedback:
                    type: string
                  next_prompt:
                    type: string
                    nullable: true
                  step_index:
                    type: integer
        "400":
          description: "An error occurred (e.g., track not found, no more steps in the track)."
          content:
            application/json:
              schema:
                type: object
                properties:
                  error:
                    type: string
Step 4: Deploying and testing the ChatGPT plugin
With these four files in place, we can now click Run on the Repl and install the ChatGPT plugin. To do so, you'll just need to go to "Develop your own plugin" and add your Replit URL:

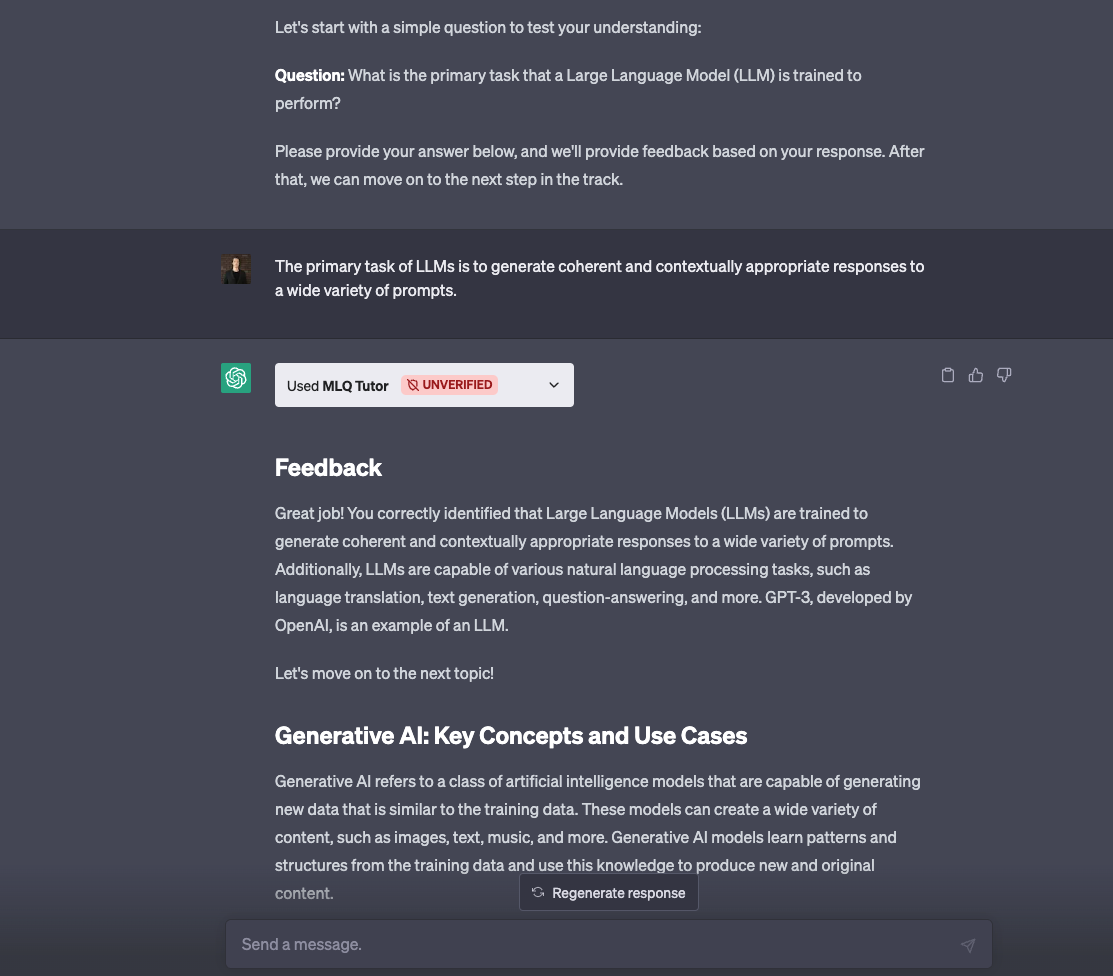
After installing and enabling the new tutor plugin, let's test it out. Here we can see the second step of the track, where it's provided feedback to the student and continued on to the next step :)
Summary: ChatGPT Plugin Tutor
In this guide, we discussed how we can build a simple ChatGPT plugin that guides user's through educational tracks and provide an interactive learning experience.
Of course, there's much more functionality we could add to build out a more complete educational assistant, such as:
- User progress tracking so they can pause and resume a learning track
- Personalized learning paths that allow users to generate custom learning pathers
- Quizes and gamification to test students knowledge and gamify it with points, leaderboards, etc.
- Intregation with external resources so that we can work with external vector databases or provide additional educational resources
For now, we'll continue experimenting with this beta version, but will definitely consider adding a few more of these features in future articles.
As Sal Khan recently highlighted in a recent Ted Talk, there is undoubtedly a massive opportunity to personalize education at scale with LLMs and generative AI...


