
In this article we're going to cover an incredible deep learning algorithm called DeepDream that can be used to generate hallucinogenic, dream-like artwork.
This article is based on notes from this course on TensorFlow 2.0 Practical Advanced and is organized as follows:
- What is DeepDream?
- How the DeepDream Algorithm Works
- DeepDream with TensorFlow 2.0
What is DeepDream?
DeepDream is a computer vision algorithm created by Google engineer Alex Mordvintsev, which uses a convolutional neural network to find and enhance certain patterns in images.
As the Guardian says:
The company’s neural network has created a slew of beautiful and at times terrifying images, and is being harnessed to create unique artwork
If you want to see examples of the DeepDream algorithm you can check out the Dreamscope app:
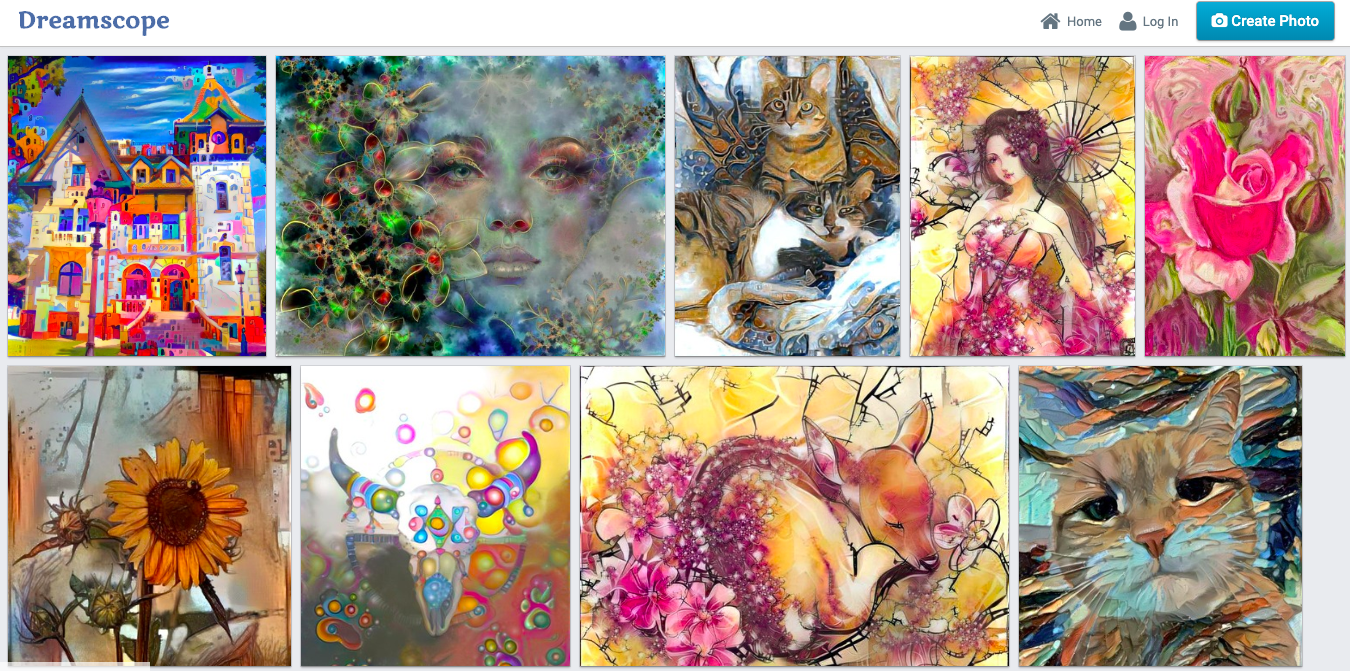
Before we get into the DeepDream algorithm itself, from an intuitive level you can think about it like staring at clouds and seeing patterns or images, a phenomenon known as pareidolia.
DeepDream does the same thing by enhancing patterns it sees in a given image based on what it has been trained to see in the past. So, if a network has been trained to recognize faces in images, then if we give it images of clouds it will try and extract faces from the clouds via algorithmic pareidolia.
Stay up to date with AI
How the DeepDream Algorithm Works
Now that we have a high level overview of DeepDream, let's cover the algorithm in a bit more detail.
First let's recap how standard convolutional neural networks work:
- We feed an image to a CNN and the first layers detect low level features such as edges
- The next set of layers of the network detect higher level features such as faces, trees, and cars
- The last few layers assemble these features into complete interpretations and classifies the image accordingly
In short, there are different layers that are responsible to perform different tasks.
The overall idea of how the DeepDream algorithm works is that we take a look at one of the layers, it could be a low level or high level feature, and we tell it to maximize the activation, or the effect that it has on an image.
To get a bit more detailed, here is how the DeepDream algorithm works:
- When you feed an image to a trained artificial neural network, the neurons fire and generate activations.
- DeepDream works by trying to change the input image in a way that makes some of these neurons fire more than others (i.e. we boost the activations). We select which neurons and which layers we want to fire more prominently.
- This process is repeated until the input image now contains all the features that specific layer was originally looking for.
For example, if a specific layer was used to detect cat faces and we feed in an image of a sky, the DeepDream algorithm would continuously change the input image and start creating images of cats on top of the blue sky.
Here are the steps we need to take for the mathematics of the DeepDream algorithm:
- Forward an image through a trained ANN, CNN, ResNet, etc.
- Select the layer of choice, recall that the first layers capture edges and deeper layers capture shapes like faces
- Calculate the activations (output) coming out of the layer of interest
- Calculate the gradient of the image with respect to the activations of the chosen layer
- Modify the image to increase these activations (we apply gradient ascent, not gradient descent), and thus we enhance the patterns seen by the network resulting in a dream-like hallucinated image
- Iterate and repeat this process over multiple scales
DeepDream with TensorFlow 2.0
Now that we have the steps for the DeepDream algorithm, let's implement it in Google Colab. The following code has been adapted from the TensorFlow 2.0 Documentation.
Step 1: Import Libraries
The first step is to import the necessary libraries after we install TensorFlow 2.0:
!pip install tensorflow-gpu==2.0.0.alpha0import tensorflow as tf
import pandas as pd
import numpy as np
import matplotlib.pyplot as plt
import seaborn as sns
import randomStep 2: Import the Model with Pre-Trained Weights
Now we're going to import Inception Net, which is a pre-trained model provided by Google, and we're going to use the imagenet weights:
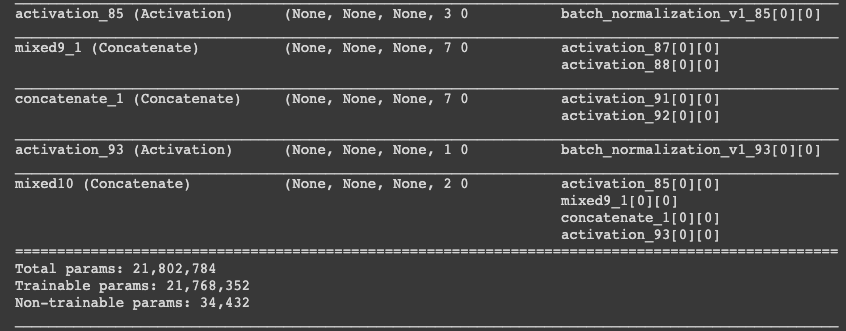
base_model = tf.keras.applications.InceptionV3(include_top=False, weights='imagenet')
base_model.summary()
As we can see this is a huge model with around 22 million total parameters:
For the DeepDream model we need to specify which activation, or which layer that we're interested in, and our objective is then to maximize the loss since we're using gradient ascent.
The early layers will be able to generate simpler features such as edges, and deeper layers will generate more complex features like faces, trees, etc.
To do this we specify the names of the layers we're interested in:
# Maximize the activation of these layers
names = ['mixed3', 'mixed5']
After that we create a for loop for our names to go through our base_model and get the layer:
layers = [base_model.get_layer(name).output for name in names]Next we create our DeepDream model, which consists of two parts:
- The entire model with the inputs we had before
- In the outputs we specify the activation we're interested in
deepdream_model = tf.keras.Model(inputs=base_model.input, outputs=layers)Step 3: Get an Image and Perform Preprocessing
Now let's load an image of Van Gough's painting Starry Night:
Sample_Image = tf.keras.preprocessing.image.load_img(r'/content/drive/My Drive/Colab Notebooks/StaryNight.jpg', target_size=(225, 375))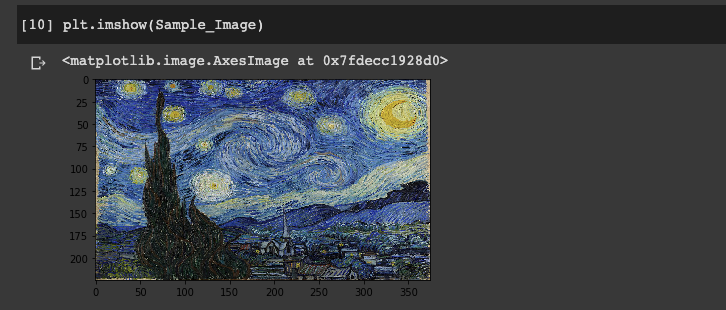
Now let's normalize the image and then turn it into an array:
Sample_Image = np.array(Sample_Image)/255.0
Sample_Image = tf.keras.preprocessing.image.img_to_array(Sample_Image)
Step 3: Run the Pretrained Model & Explore Activations
Now let's take our image and preprocess the input with the pretrained Inception Net model:
Sample_Image = tf.Variable(tf.keras.applications.inception_v3.preprocess_input(Sample_Image))Now we want to expand the dimensions of the image so that it is in what's referred to as batch format:
Sample_Image = tf.expand_dims(Sample_Image, axis=0)
np.shape(Sample_Image)
Now we're ready to run our activations with our deepdream_model:
activations = deepdream_model(Sample_Image)Step 4: Calculate the DeepDream Loss
We now want to write a function whose objective is to select a layer and maximize the loss, which is the activations generated by the layer of interest.
The Inception Network that we're using has multiple concatenated layers called mixed, and we can use these to calculate the loss which represents the sum of the activations of a given layer.
As mentioned, instead of minimizing the loss with gradient descent as we usually do with most neural networks, with DeepDream we're trying to maximize the loss with gradient ascent.
To do this we're going to write a function called calc_loss which takes in the image and the model. The function works by feedfowarding the input image through the network and generating the activations. We then obtain the average and sum of those outputs:
def calc_loss(image, model):
  # convert to batch format
  img_batch = tf.expand_dims(image, axis=0)
  # run the model
  layer_activations = model(img_batch)
  print('Activation Values (Layer Output) = \n', layer_activations)
  print('Activation Shape = \n', np.shape(layer_activations))

  # create an empty array to accumulate the losses
  losses = []
  for act in layer_activations:
    # calculate the mean of each activation
    loss = tf.math.reduce_mean(act)
    losses.append(loss)

  print('Losses (from multiple activation layers = )', losses)
  print('Losses shape (from multiple activation layers =)', np.shape(losses))
  print('Sum of all losses (from all selected layers=)', tf.reduce_sum(losses))

  # calcualte sum
  return tf.reduce_sum(losses)
Now we're ready to test the function:
Sample_Image= tf.keras.preprocessing.image.load_img(r'/content/drive/My Drive/Colab Notebooks/StaryNight.jpg', target_size = (225, 375))
Sample_Image = np.array(Sample_Image)/255.0
Sample_Image = tf.keras.preprocessing.image.img_to_array(Sample_Image)
Sample_Image = tf.Variable(tf.keras.applications.inception_v3.preprocess_input(Sample_Image))

loss = calc_loss(Sample_Image, deepdream_model)
loss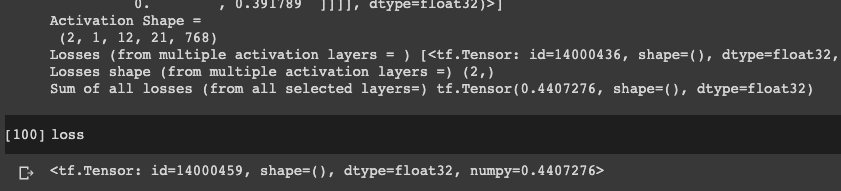
Step 5: Gradient Ascent Calculations
We're now ready to calculate gradient ascent and run our DeepDream algorithm.
For this step, we're going to rely on the loss that was calculated in the previous step. We then calculate the gradient with respect to the given input image, and then we add it to the original image.
To do this we're going to write a function called deepdream which takes in the model, image, and step_size:
- We're then going to use
tf.GradientTape()which obtains the gradient and records the progress throughout the training. - We then calculate the loss with our previous
calc_lossfunction - Next we calculate the
gradientswith respect to the pixels of the input image - After we obtain the gradient we compute the standard deviation of the elements across the dimensions of a tensor
- Now we update the image by adding the
gradientsand thestep_size(you can think of this as the learning rate) - The reason we annote the function with
@tf.functionis that it will be compiled into a graph so it will be much faster and can be executed with a TPU or GPU
@tf.function
def deepdream(model, image, step_size):
    with tf.GradientTape() as tape:
      tape.watch(image)
      loss = calc_loss(image, model)

    gradients = tape.gradient(loss, image)

    print('GRADIENTS =\n', gradients)
    print('GRADIENTS SHAPE =\n', np.shape(gradients))

    gradients /= tf.math.reduce_std(gradients)

    image = image + gradients * step_size
    image = tf.clip_by_value(image, -1, 1)

    return loss, image
Now we're ready to run our DeepDream model by passing in the model, image, steps, and step_size:
- To do this we write a
forloop and at eachstepwe're going to call ourdeepdreammodel and return thelossand theimage - Every 100 steps we're going to show the progress of the model and show the final value of the image
- Finally we return the image, which we
deprocessto normalize it
def run_deep_dream_simple(model, image, steps=100, step_size=0.01):
  image = tf.keras.applications.inception_v3.preprocess_input(image)

  for step in range(steps):
    loss, image = deepdream(model, image, step_size)

    if step % 100 == 0:
      plt.figure(figsize=(12,12))
      plt.imshow(deprocess(image))
      plt.show()
      print ("Step {}, loss {}".format(step, loss))

  plt.figure(figsize=(12,12))
  plt.imshow(deprocess(image))
  plt.show()

  return deprocess(image)
def deprocess(image):
image = 255*(image + 1.0)/2.0
return tf.cast(image, tf.uint8)We can now run the DeepDream model with our original Starry Night image:
Sample_Image= tf.keras.preprocessing.image.load_img(r'/content/drive/My Drive/Colab Notebooks/StaryNight.jpg', target_size = (225, 375))

Sample_Image = np.array(Sample_Image)
dream_img = run_deep_dream_simple(model=deepdream_model, image=Sample_Image,
                                  steps=2000, step_size=0.001)
Here is image after the first 100 steps:
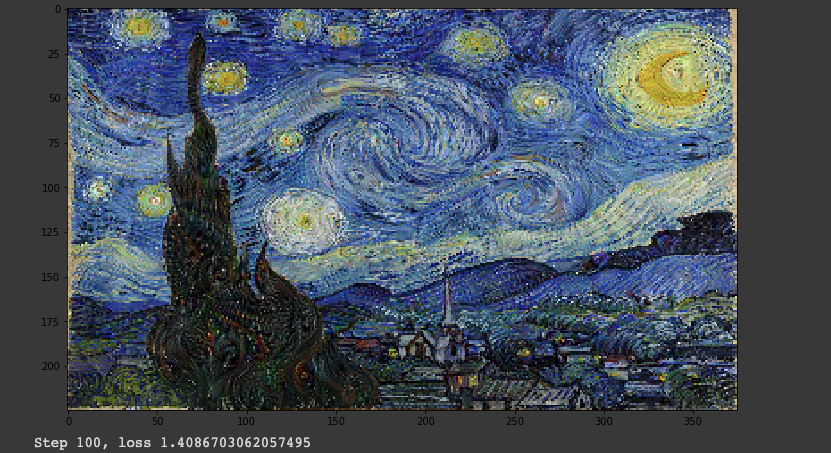
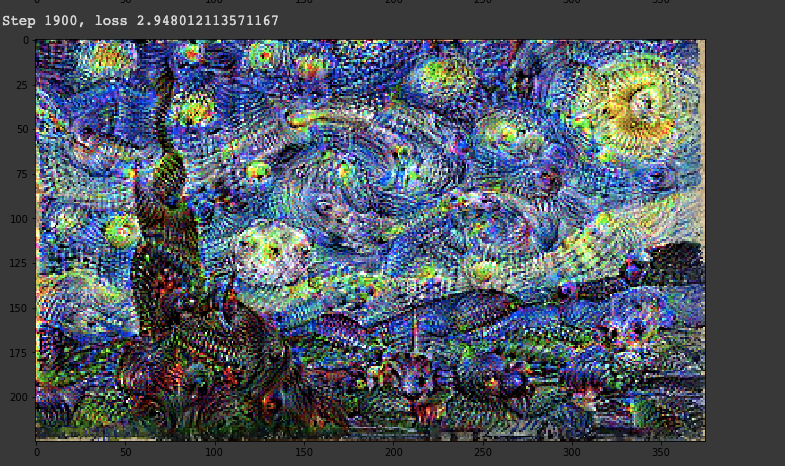
And finally here is the image after 2000 steps, and we can see the loss has gone up as expected:
Summary: DeepDream with TensorFlow 2.0
As we've seen, DeepDream is a powerful computer vision algorithm that uses a convolutional neural network to find and enhance certain patterns in images.
If you want to generate your own DeepDream images you can use the Deep Dream Generator, or check out the following resources.

