

As I've been experimenting with GPT 3.5's new fine tuning capability, I found myself want to build a simple frontend to streamline the data and model creation steps.
While both of these are relatively simple tasks, it still becomes quite tedious, and I imagine many non-programmers will want to experiment with fine tuning with a no-code tool. So, in this guide we'll look at how to build a simple no-code frontend for fine tuning using Streamlit.
Specifically, this simple app will streamline the process of fine tuning by following these five steps:
- Generate a fine tuning dataset by providing 10+ examples of ideal input-output pairs (or upload existing datasets)
- Run the dataset through a data verification & cost estimation script to ensure it's in the right format
- Upload the data to OpenAI
- Create a fine tuning job
- Retrieve the fine tuned model
Let's get started.
Step 0: Installs & Imports
First off, let's create a new fine_tuning.py and set the following imports and our OpenAI API as follows:
import streamlit as st
import json
import openai
from collections import defaultdict
import os
from dotenv import load_dotenv
load_dotenv()

# Set your OpenAI API key
OPENAI_API_KEY = os.environ.get("OPENAI_API_KEY")
openai.api_key = OPENAI_API_KEY
Step 1: Data preparation
Next, let's build a simple frontend to stream the process of creating fine tuning datasets. As OpenAI highlights, we need 10+ examples of message inputs in following format:
{"messages": [{"role": "system", "content": "controls the overall chatbot behavior."}, {"role": "user", "content": "example of user input"}, {"role": "assistant", "content": "example of ideal generated output"}]}
Since we'll have the same system message for each prompt, we just need the user to provide that once, and then provide 10+ examples of ideal input-output pairs:

In order to convert the system message and input-output pairs to the desired JSONL format we can use the following to_jsonl function:
- We start with an empty string called
jsonl_str - Then, we loops through pairs of inputs and outputs taken from
input_listandoutput_list. - For each pair, it creates a little JSON object with three messages:
- A system message, using the content from the
system_message. - A user message, using the content from the current item in
input_list. - An assistant message, using the content from the matching item in
output_list.
- A system message, using the content from the
- It then turns this JSON object into a string and adds it to
jsonl_str, followed by a newline. - Finally, it returns the whole
jsonl_strfull of these JSON objects, each separated by a newline.
def to_jsonl(system_message, input_list, output_list):
    jsonl_str = ''
    for inp, out in zip(input_list, output_list):
        json_obj = {
            "messages": [
                {"role": "system", "content": system_message},
                {"role": "user", "content": inp},
                {"role": "assistant", "content": out}
            ]
        }
        jsonl_str += json.dumps(json_obj) + '\n'
    return jsonl_str
We'll also create a function to save this to a JSONL file:
def save_jsonl(jsonl_str, filename):
    with open(filename, 'w') as f:
        f.write(jsonl_str)
    return filename
Now, we can use these functions in our Streamlit frontend and show the user input boxes for the system message and the ideal user and AI response pairs.
Here's an overview of how the code works:
- System Message: A text input is provided to enter a system message that sets the context for the language model.
- State Initialization: A session state variable
num_rowsis initialized to keep track of how many input-output pairs you want to add. - Expandable Section: Inside this section, you see two columns: one for user inputs and another for corresponding AI outputs.
- This loops through
num_rowsto dynamically generate text fields for both the user's and AI's messages. - These get stored in the
input_listandoutput_listarrays respectively.
- This loops through
- Generate JSONL File Button: Once clicked, it triggers the
to_jsonl()function with the currentsystem_message,input_list, andoutput_list.- If all fields are filled in and the lists match in length, it saves this data to a file via
save_jsonl().
- If all fields are filled in and the lists match in length, it saves this data to a file via
- Download Option: After the JSONL file is generated, a download button appears.
- Clicking this will download the JSONL file to your system, named as 'generated_fine_tune_data.jsonl'.
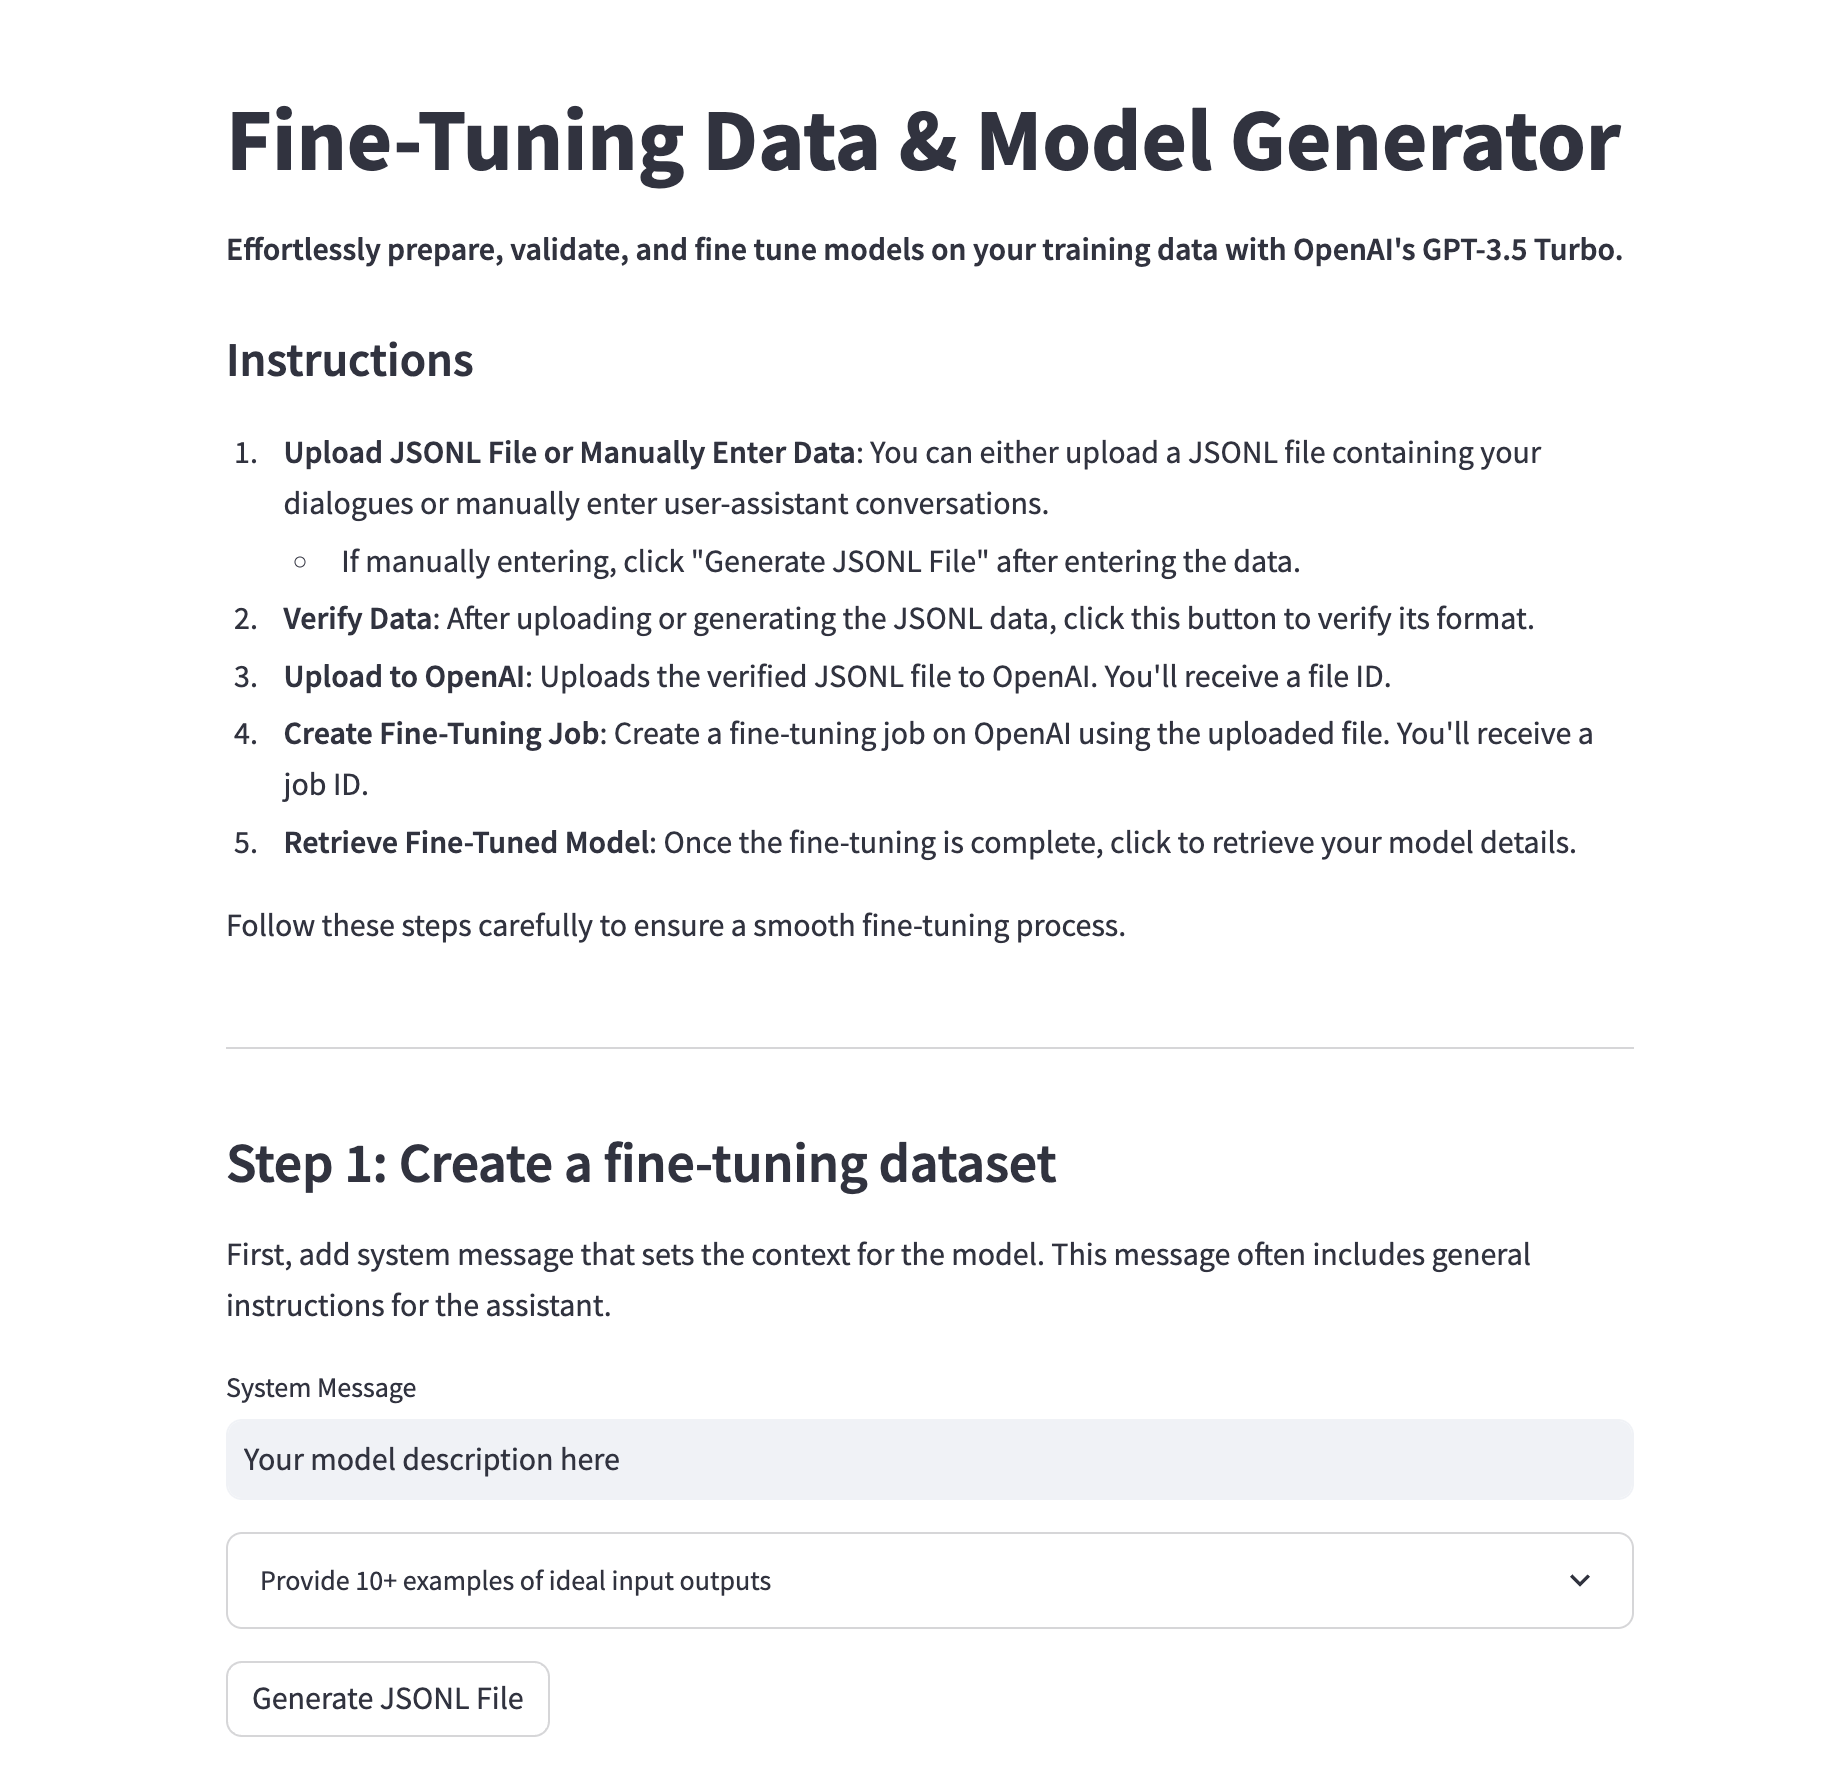
st.subheader("Step 1: Create a fine-tuning dataset")
st.markdown("First, add system message that sets the context for the model.")
system_message = st.text_input("System Message", "Your model description here")
# Initialize the state variable for the number of rows if it doesn't exist
if 'num_rows' not in st.session_state:
st.session_state.num_rows = 10 # initial number of rows
# Display the expandable section
with st.expander("Provide 10+ examples of ideal input outputs", expanded=False):
input_list = []
output_list = []
# Loop through the current number of rows in the state
for i in range(st.session_state.num_rows):
col1, col2 = st.columns(2)
with col1:
input_text = st.text_input(f"User Input {i + 1}")
with col2:
output_text = st.text_input(f"AI Output {i + 1}")
input_list.append(input_text)
output_list.append(output_text)
# "+" Button to add one more row
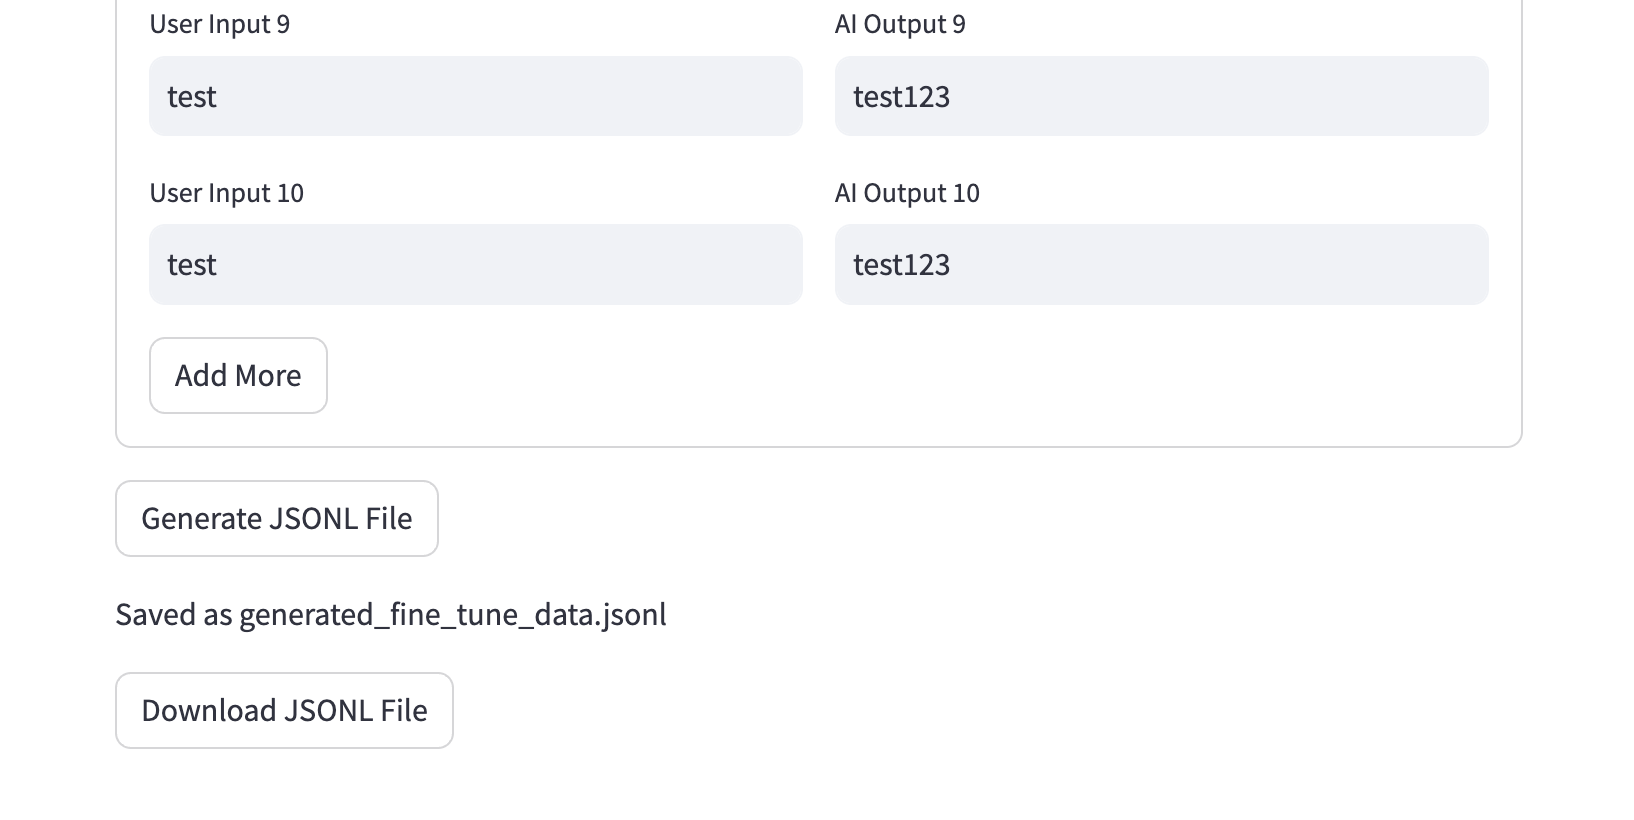
if st.button('Add More'):
st.session_state.num_rows += 1 # increase the number of rows by 1
# Generate button for Step 1
if st.button('Generate JSONL File'):
jsonl_str = to_jsonl(system_message, input_list, output_list)
st.session_state.jsonl_str = jsonl_str
st.session_state.filename = 'generated_fine_tune_data.jsonl'
if system_message and len(input_list) == len(output_list) and all(input_list) and all(output_list):
save_jsonl(jsonl_str, st.session_state.filename)
st.write(f"Saved as {st.session_state.filename}")
# Convert the JSONL string to bytes
jsonl_bytes = st.session_state.jsonl_str.encode('utf-8')
# Create a download button with the bytes data
st.download_button(
label="Download JSONL File",
data=jsonl_bytes,
file_name=st.session_state.filename,
mime="text/jsonl",
)Step 2: Data Verification & Cost Estimation
Now that we've generated a JSONL file, we can verify it's in the correct format using the script OpenAI provides here. We won't cover all the code here as it's well defined in the Cookbook, but for the Streamlit code we'll just need to use the session state of the jsonl_str we just created:
def verify_data_format(jsonl_str):
    # ...
    # see cookbook for details
All this function does is:
- Checks the data type of each entry.
- Validates the keys and roles in each message.
- Displays the errors found during the verification process.
- Estimates the token usage (i.e. cost) of the fine tuning job
st.markdown("### Step 2: Verify Data")
if st.button('Verify Data') and st.session_state.jsonl_str:
    verify_data_format(st.session_state.jsonl_str)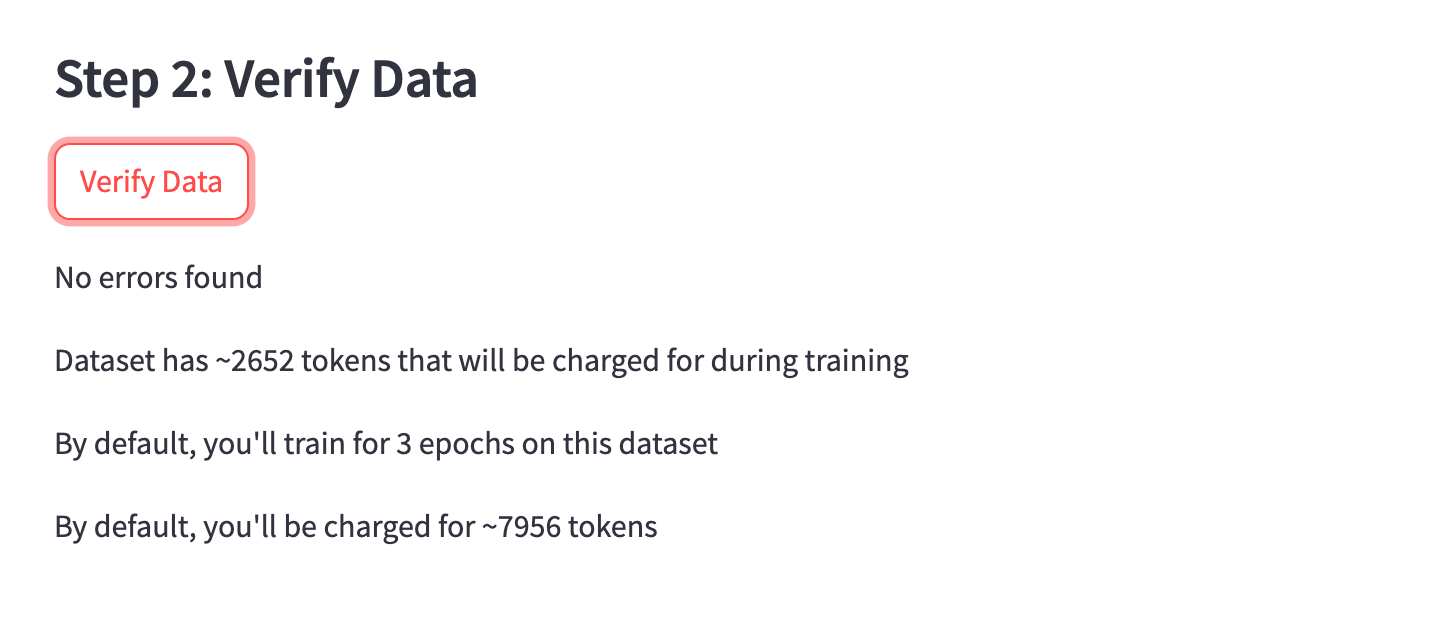
Step 3: Uploading the file to OpenAI
Once the JSONL file is verified, we can upload it to OpenAI with their File.create method with the purpose of fine-tune:
def upload_to_openai(filename):
    with open(filename, "rb") as f:
        file = openai.File.create(file=f, purpose="fine-tune")
    return file.id
And on the frontend all we need is to use that function with the st.session_state.filename:
st.markdown("### Step 3: Upload to OpenAI")
if st.button('Upload to OpenAI') and st.session_state.jsonl_str and st.session_state.filename:
    file_id = upload_to_openai(st.session_state.filename)
    st.session_state.file_id = file_id
    st.write(f"Uploaded to OpenAI with file ID: {file_id}")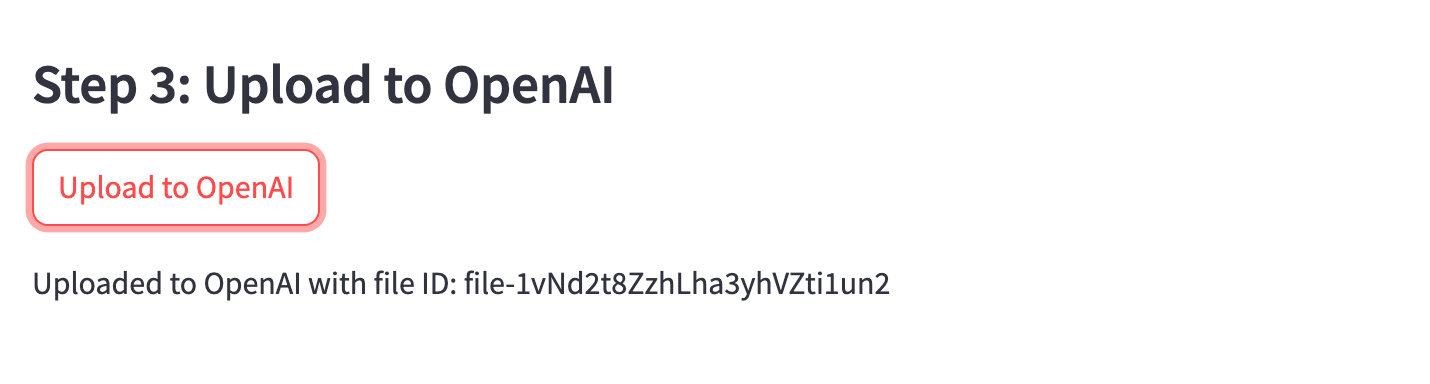
As you can see, after this upload we also need to need the file_id output, which we'll store to st.session_state.file_id for the next step.
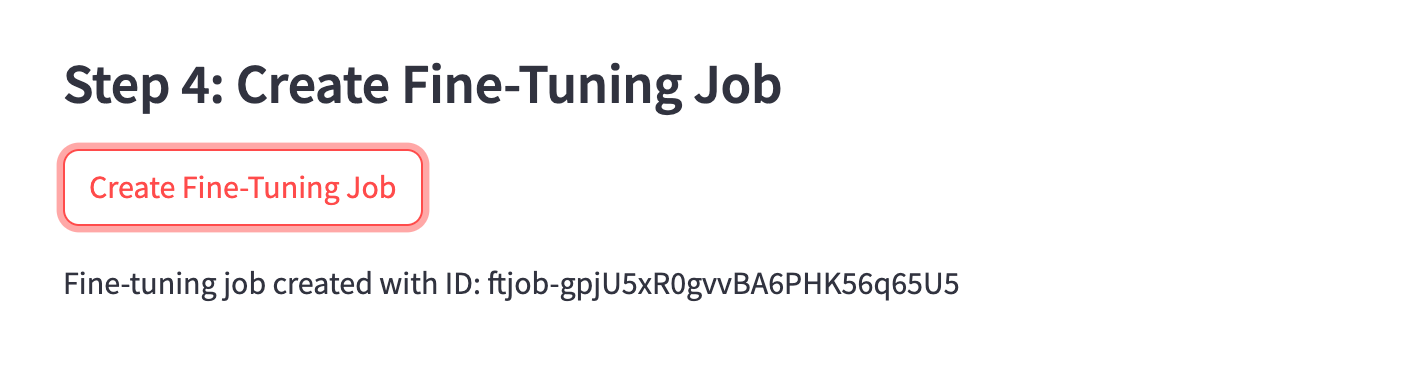
Step 4: Create a Fine-Tuning Job
Now, with the file ID generated, we can use that to create the fine tuning job with the openai.FineTuningJob.create() method:
# Step 5: Create Fine-Tuning Job
st.markdown("### Step 4: Create Fine-Tuning Job")
if st.button('Create Fine-Tuning Job') and st.session_state.file_id:
    try:
        fine_tuning_job = openai.FineTuningJob.create(
            training_file=st.session_state.file_id,
            model="gpt-3.5-turbo"
        )
        st.session_state.fine_tuning_job_id = fine_tuning_job['id']
        st.write(f"Fine-tuning job created with ID: {fine_tuning_job['id']}")
    except openai.error.InvalidRequestError as e:
        st.write(f"Error: {e}")
        st.write("File is still being processed and is not ready for fine-tuning. Please try again later.")
Step 5: Retrieve the fine tuned model ID
After this we just need to store the fine_tuning_job['id'] so we can retrieve the job after it's completed and display the new model ID:
# Step 6: Retrieve Fine-Tuned Model
st.markdown("### Step 6: Retrieve Fine-Tuned Model")
if st.button('Retrieve Fine-Tuned Model') and st.session_state.fine_tuning_job_id:
    retrieved_job = openai.FineTuningJob.retrieve(st.session_state.fine_tuning_job_id)
    fine_tuned_model = retrieved_job.get("fine_tuned_model", None)

    # Displaying the fine-tuning job details in a nicer format
    st.markdown(f"**Fine-Tuned Model:** `{fine_tuned_model}`")
    st.markdown(f"**Status** {retrieved_job.get('status', 'N/A')}")
    st.markdown(f"**Object:** {retrieved_job.get('object', 'N/A')}")
    st.markdown(f"**ID:** {retrieved_job.get('id', 'N/A')}")
    st.markdown(f"**Model:** {retrieved_job.get('model', 'N/A')}")
    st.markdown(f"**Created At:** {retrieved_job.get('created_at', 'N/A')}")
    st.markdown(f"**Finished At:** {retrieved_job.get('finished_at', 'N/A')}")
    hyperparams = retrieved_job.get("hyperparameters", {})
    st.markdown(f"**Number of Epochs:** {hyperparams.get('n_epochs', 'N/A')}")
Nice. We've now got our fine tuned model ID and can start testing it in OpenAI's playground or elsewhere.
Summary: Fine Tuning Data & Model Generator
While this is still a very simple app, the ability to prepare, validate, and fine-tune models from a simple interface makes it quite a useful tool for AI practitioners. I've been using it quite frequently for personal projects, so I may end up deploying it to the MLQ app...
In the meantime, if you're interested in creating your own custom datasets for GPT fine tuning, you can fill out the form here and we'll be happy to help.
If you'd like the full code for this project, you can signup for MLQ premium here and access it below:
This content is only available to subscribers
Subscribe now and have access to all our stories, enjoy exclusive content and stay up to date with constant updates.
Sign up nowAlready have an account? Sign in


