

In our previous guides on LangChain and GPT programming, we've looked at a variety of useful AI assistants, including:
In this guide, we'll focus on building an GPT-enabled assistant that allows you to chat with CSVs. We'll also build a simple frontend using Streamlit that allows us to query and visualize data.
 Peter Foy
To do so, we'll be using LangChain's CSV agent, which works as follows:
this agent calls the Pandas DataFrame agent under the hood, which in turn calls the Python agent, which executes LLM generated Python code.
In other words, we're using the power of Large Language Models (LLMs) to efficiently be able to query unstructured text data using natural language. This is particularly useful as a starting point for building an end-to-end AI data analyst.
Alright, now that we know what we're building let's jump into the code.
Step 0: Installs & imports
First up, we'll need to pip install the following libraries into our environment:
!pip install langchain openai streamlit tabulate
Next up, let's create a new csv_agent.py and import the following libraries, and we'll also need to set our OpenAI API key:
import streamlit as st
import pandas as pd
import json
import openai
import os
import re
import matplotlib.pyplot as plt
from langchain.agents import create_csv_agent
from langchain.chat_models import ChatOpenAI
from langchain.agents.agent_types import AgentType
from apikey import OPENAI_API_KEY
openai.api_key = OPENAI_API_KEY
Step 1: Creating the CSV Agent Function
Next up, let's create a csv_agent_func function, which works as follows:
- It takes in two parameters,
file_pathfor the path to a CSV file anduser_messagefor the message or query from a user. - We then initialize a
csv_agentusing thecreate_csv_agentfunction. - We use
ChatOpenAIis used for the agent with the following settings:temperature=0: Reduces randomness, leading to consistent outputs.model="gpt-3.5-turbo-0613": Specifies the model as GPT-3.5 Turbo.openai_api_key=OPENAI_API_KEY: Provides the necessary API key for model access.
- The agent is then pointed to the CSV file using
file_path. - We set
verbose=Trueto provide detailed output logs in the terminal - We specify the agent type with
agent_type=AgentType.OPENAI_FUNCTIONS, telling it to use OpenAI models that are fine-tuned for function calls. - The agent processes the
user_messagevia itsrunmethod and returns the result from the agent.
In case you're unfamiliar with GPT function calling:
In an API call, you can describe functions togpt-3.5-turbo-0613andgpt-4-0613, and have the model intelligently choose to output a JSON object containing arguments to call those functions.
def csv_agent_func(file_path, user_message):
    """Run the CSV agent with the given file path and user message."""
    agent = create_csv_agent(
        ChatOpenAI(temperature=0, model="gpt-3.5-turbo-0613", openai_api_key=OPENAI_API_KEY),
        file_path,
        verbose=True,
        agent_type=AgentType.OPENAI_FUNCTIONS,
    )

    try:
        # Properly format the user's input and wrap it with the required "input" key
        tool_input = {
            "input": {
                "name": "python",
                "arguments": user_message
            }
        }

        response = agent.run(tool_input)
        return response
    except Exception as e:
        st.write(f"Error: {e}")
        return None
Step 2: Rendering the Agent's JSON Response in Streamlit
Next, let's build a function called display_content_from_json , which is designed to take in a JSON response from our CSV agent and render the appropriate content using Streamlit. Here's an overview of how it works:
- It takes in a single parameter
json_responsefor the structured data (JSON) that comes from the agent. - If the response contains the "answer" key, indicating a textual answer from the agent, it's directly displayed in Streamlit with
st.write() - When the agent sends back data for a bar chart (under the "bar" key), this part of the function gets into action.
- The data is transformed into a Pandas DataFrame.
- We then display a bar chart in Streamlit with
st.bar_chart()
- If the response carries data for a table (highlighted by the "table" key), the table data is processed and converted into a DataFrame, and displayed in Streamlit with
st.table()
We can extend this function to handle more data visualization types, although for now that will get us started.
def display_content_from_json(json_response):
    """
    Display content to Streamlit based on the structure of the provided JSON.
    """

    # Check if the response has plain text.
    if "answer" in json_response:
        st.write(json_response["answer"])

    # Check if the response has a bar chart.
    if "bar" in json_response:
        data = json_response["bar"]
        df = pd.DataFrame(data)
        df.set_index("columns", inplace=True)
        st.bar_chart(df)

    # Check if the response has a table.
    if "table" in json_response:
        data = json_response["table"]
        df = pd.DataFrame(data["data"], columns=data["columns"])
        st.table(df)
Step 3: Extracting Python Code from Agent's Response
Next up, since the agent's response will often include both text and code, lets write a function called extract_code_from_response function, whose operations are:
- Regular Expressions:
- To identify and extract the embedded code we use a regular expression with the pattern
r"```python(.*?)```". This should match content that is wrapped between triple backticks with the prefixpython, denoting a code block.
- To identify and extract the embedded code we use a regular expression with the pattern
- Code Extraction:
- If a match is found using the regex, the Python code is extracted.
- If there are any leading and trailing whitespaces, these are removed to ensure a clean execution later on.
- No Match Scenario: If no Python code is found within the response, the function simply returns
None.
def extract_code_from_response(response):
    """Extracts Python code from a string response."""
    # Use a regex pattern to match content between triple backticks
    code_pattern = r"```python(.*?)```"
    match = re.search(code_pattern, response, re.DOTALL)

    if match:
        # Extract the matched code and strip any leading/trailing whitespaces
        return match.group(1).strip()
    return None
Step 4: Building the CSV Assistant Streamlit App
Last step, let's build the simple streamlit UI that puts everything together with the csv_analyzer_app function:
- We start by defining the title and subtitle
- The
st.file_uploaderfeature enables users to upload CSV files, which are temporarily stored in theuploaded_filevariable. - If a file is successfully uploaded, its meta details are collated into the
file_detailsdictionary and displayed. - For processing, the file is saved to a temporary location,
"/tmp". - We subsequently load this file into a pandas dataframe,
df, to preview its content. - After the file previews, a text input box is set up using
st.text_input, where users can input their query about the CSV data. - A button labeled 'Run' is rendered using
st.button. When clicked:- The
csv_agent_funcfunction is called, taking the file path and the user's query as arguments. The outcome is then stored in theresponsevariable. - We further utilize the
extract_code_from_responsefunction to pull out any executable Python code from the returned response. - If data visualization code is detected:
- We attempt to run it in the current context.
- We make the dataframe
dfand the plotting librarypltavailable to the executing code. - Any generated plot is then captured using
plt.gcf()and subsequently displayed using Streamlit'sst.pyplotmethod. - If an error occurs during the code execution, an error message is displayed to the user.
- If no executable code is found in the response, the raw response is displayed directly.
- The
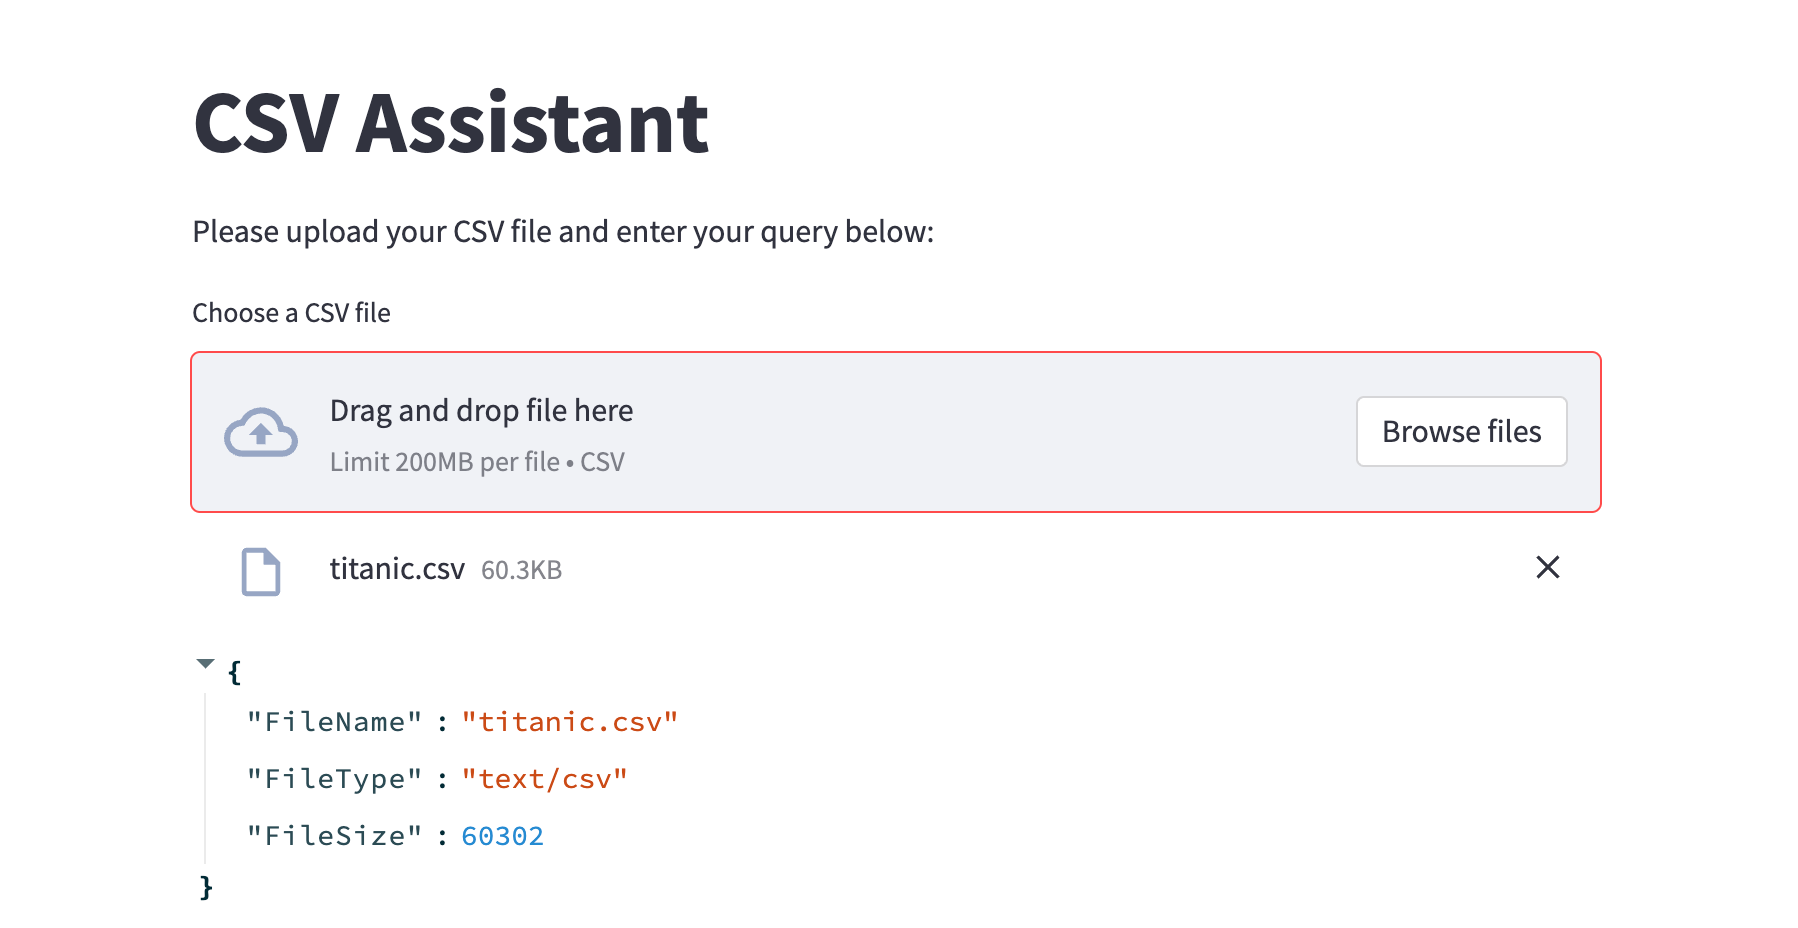
def csv_analyzer_app():
"""Main Streamlit application for CSV analysis."""
st.title('CSV Assistant')
st.write('Please upload your CSV file and enter your query below:')
uploaded_file = st.file_uploader("Choose a CSV file", type="csv")
if uploaded_file is not None:
file_details = {"FileName": uploaded_file.name, "FileType": uploaded_file.type, "FileSize": uploaded_file.size}
st.write(file_details)
# Save the uploaded file to disk
file_path = os.path.join("/tmp", uploaded_file.name)
with open(file_path, "wb") as f:
f.write(uploaded_file.getbuffer())
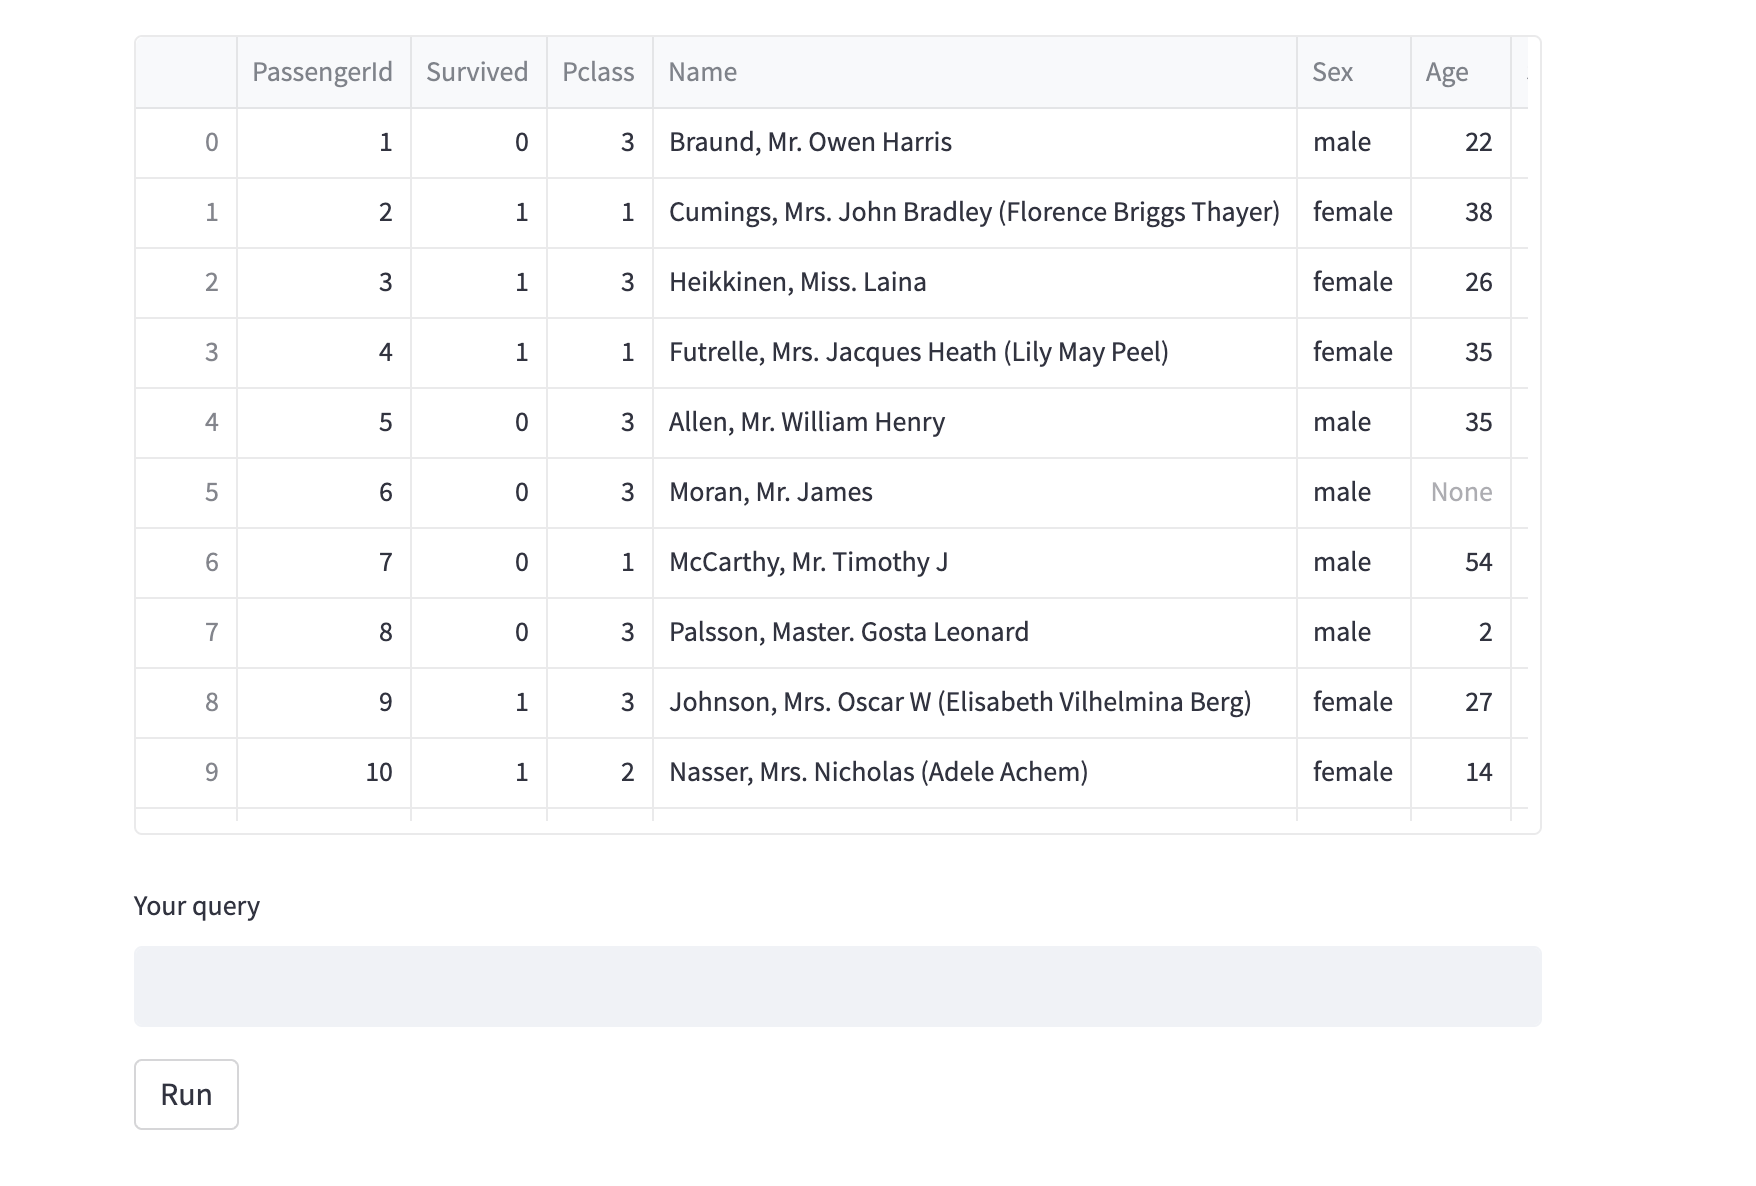
df = pd.read_csv(file_path)
st.dataframe(df)
user_input = st.text_input("Your query")
if st.button('Run'):
response = csv_agent_func(file_path, user_input)
# Extracting code from the response
code_to_execute = extract_code_from_response(response)
if code_to_execute:
try:
# Making df available for execution in the context
exec(code_to_execute, globals(), {"df": df, "plt": plt})
fig = plt.gcf() # Get current figure
st.pyplot(fig) # Display using Streamlit
except Exception as e:
st.write(f"Error executing code: {e}")
else:
st.write(response)
st.divider()Chatting with CSVs
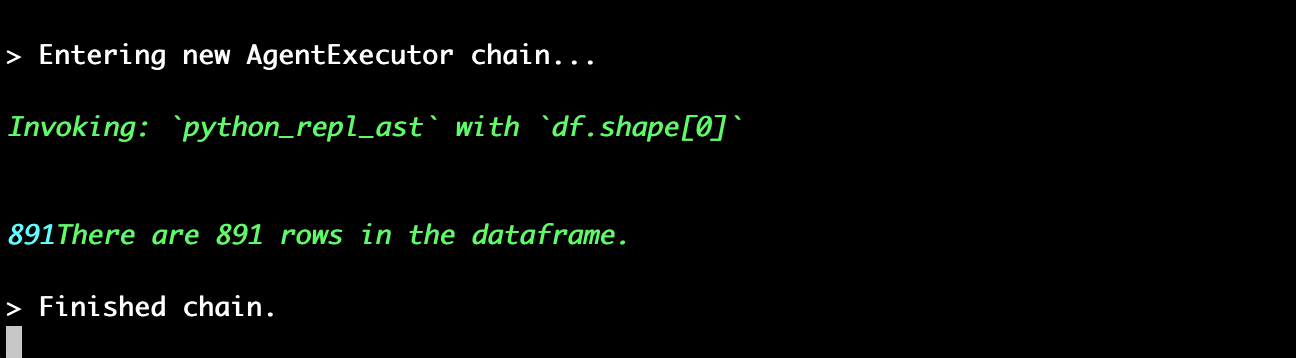
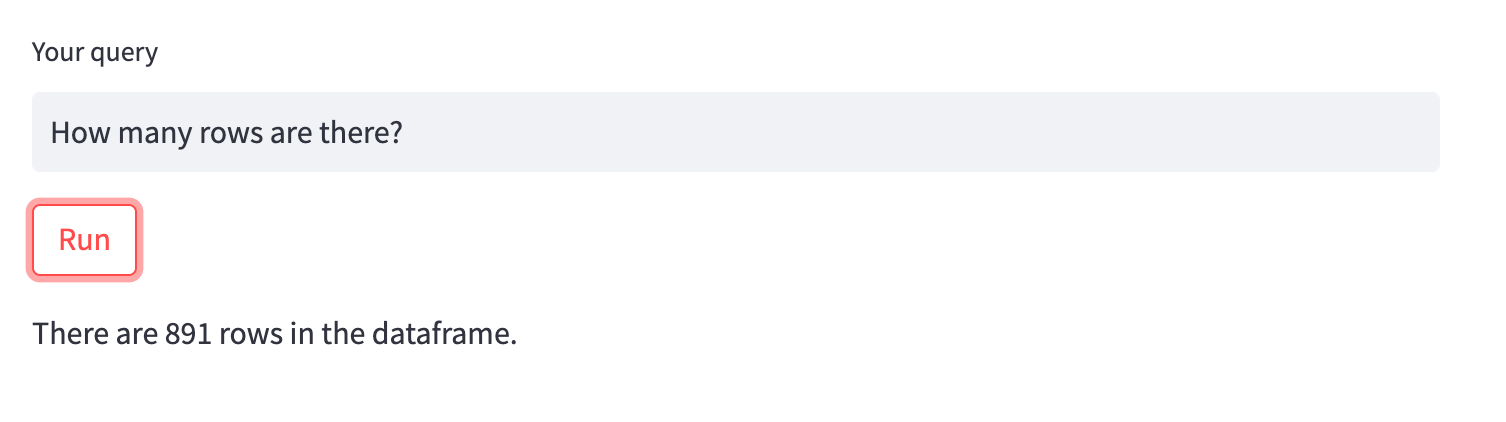
Let's test this out with the classic Titanic CSV, we'll start with a simple query "How many rows are there?" We can see in the terminal the Python that's exectued and we get the correct answer:
Now let's try and visualize some data with the query "Show me how many male vs females there are in a bar chart?"

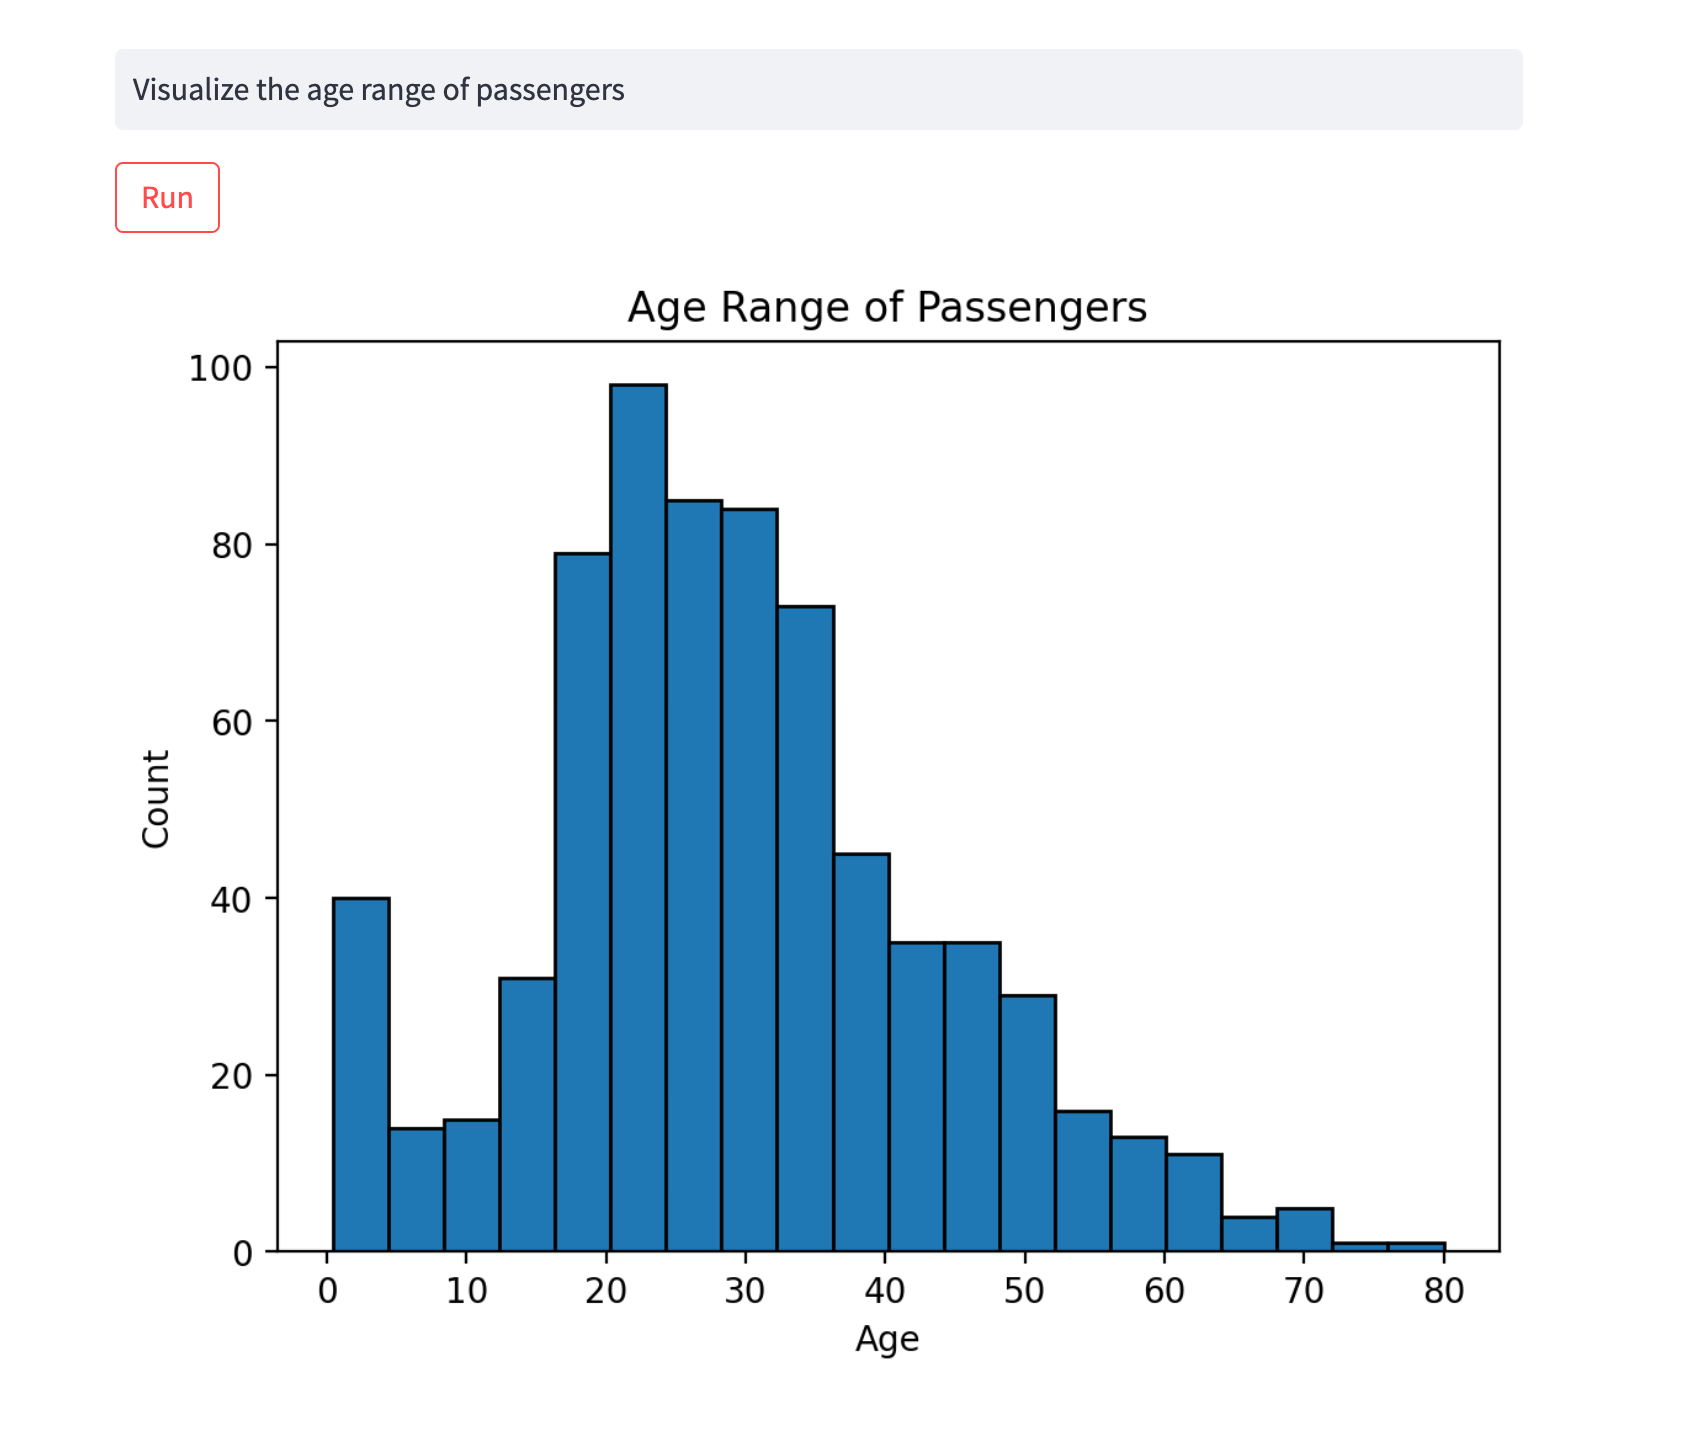
Looking good. Let's check out the distribution of passenger' ages:
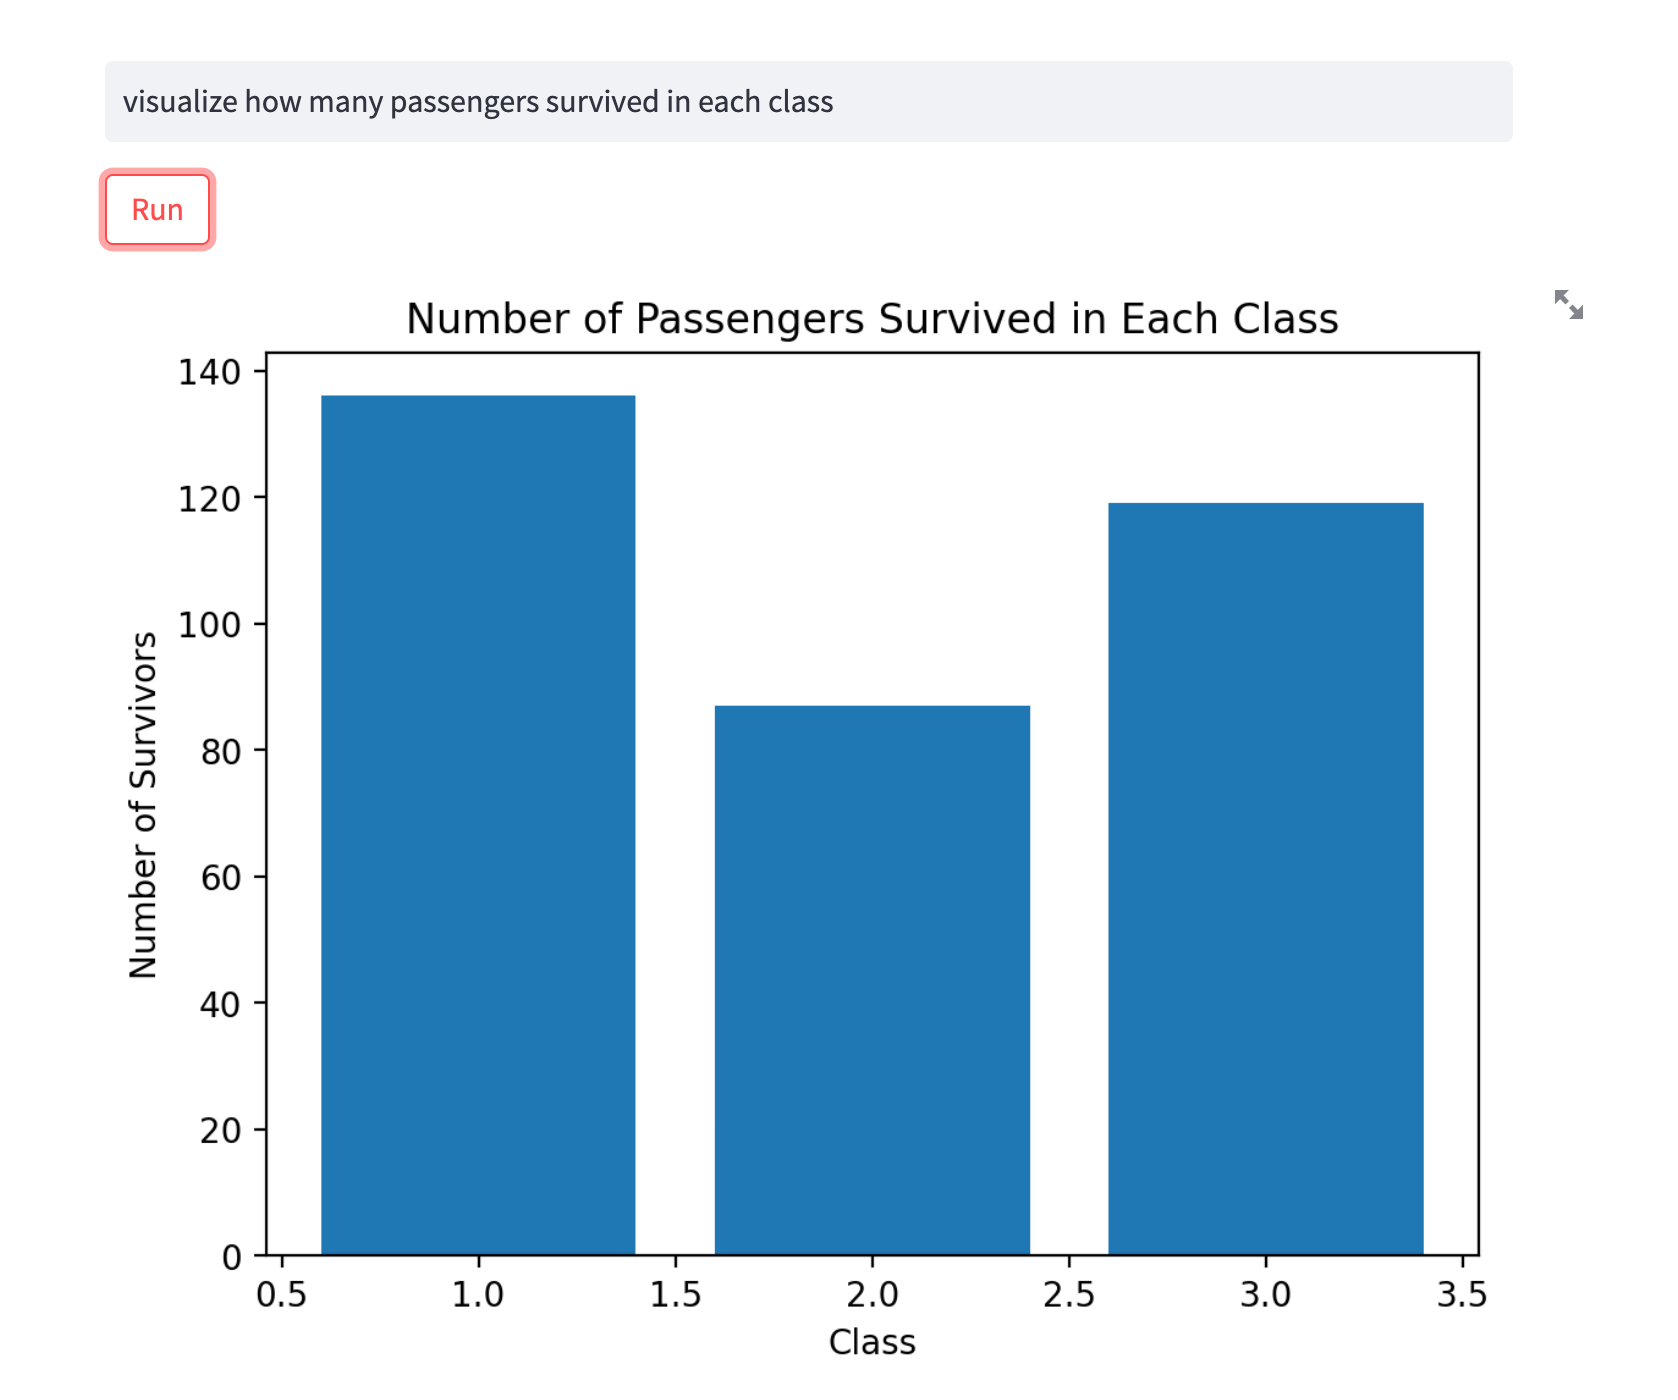
Lastly, let's check out how many passengers survived in each class:
Safety Consideration
As mentioned in LangChain's API docs, it's worth noting that the CSV Agent calls the Pandas DataFrame agent, which in turn executes LLM-generated Python code.
...this can be bad if the LLM generated Python code is harmful. Use cautiously.
Summary: Chatting with CSV's using LangChain
In this guide, we saw how in ~100 lines of Python we can chat with CSV's using LangChain and OpenAI. With a few extra data processing steps we've also added the ability to visualize the Python code that the agent outputs.
While certainly still a beta, this serves as a starting point for building an end-to-end AI data analyst, similar to ChatGPT's Code Interpreter.
Peter Foy


